Upgrading to SAML SCIM for Azure
Background
SCIM is a standard designed to make managing user identities in cloud-based applications and services easier. By configuring SCIM provisioning within your Identity Provider, you can easily control access to Brilliant by adding and removing users from your SCIM-enabled IdP applications and control access to Team Stores through IdP groups.
Configuring Single Sign-On Enterprise Application
Follow our guide to configure your Enterprise SSO application.
Provisioning Setup
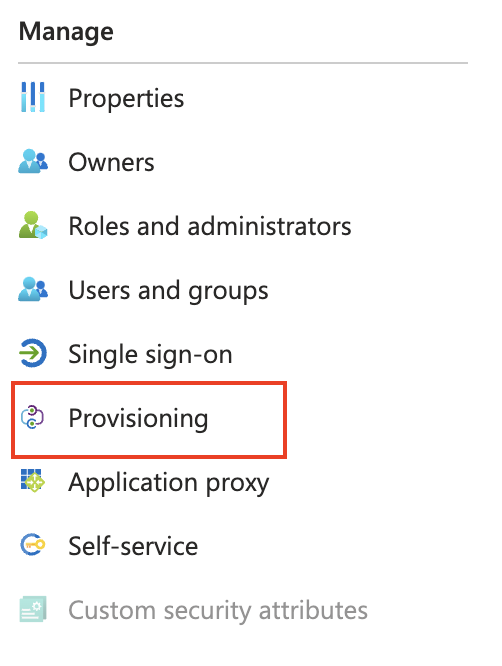
Click on Provisioning from the Manage menu
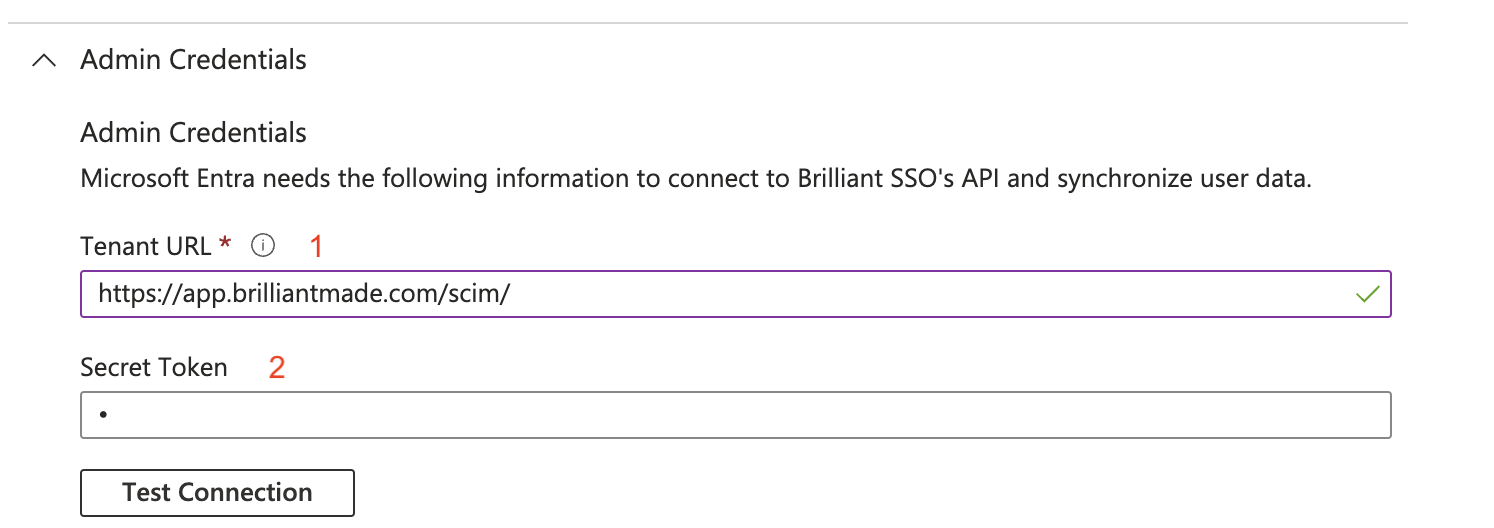
Admin Credentials
Enter https://app.brilliantmade.com/scim/ into the Tenant URL field
Enter your SCIM Bearer Token from the Brilliant Azure integration config page into the Secret Token field
- Click Test Connection to test the connection.

Mappings
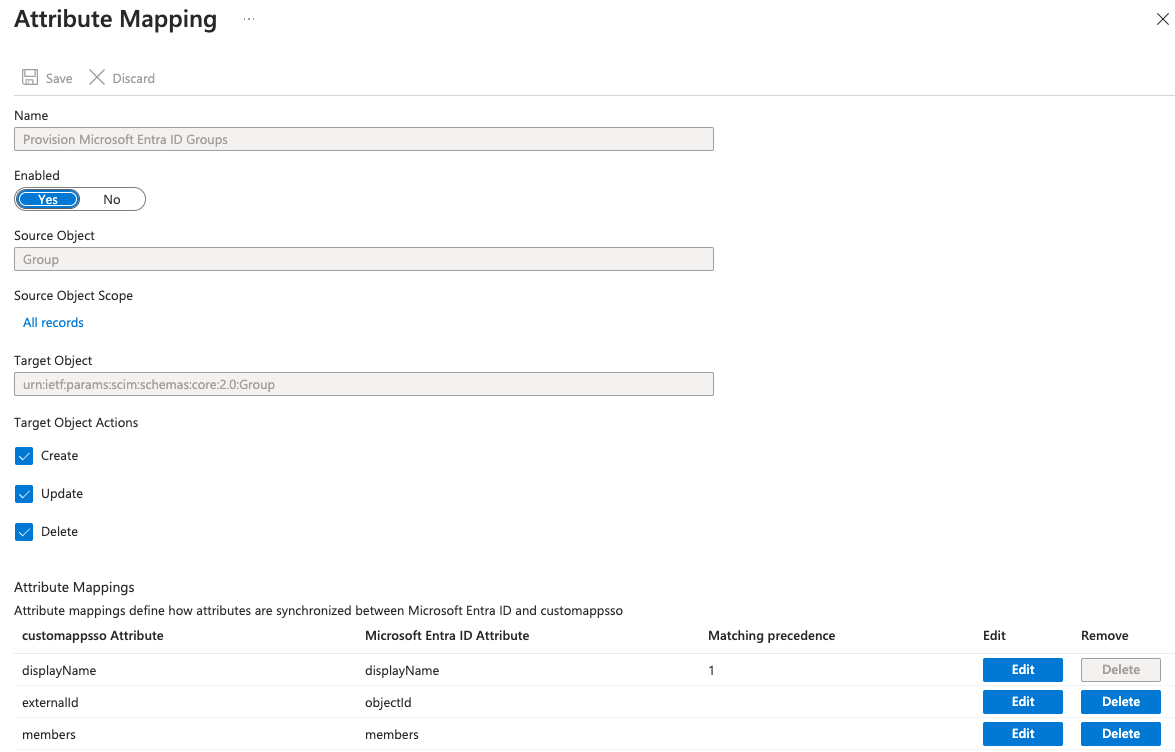
Group Mappings
Ensure the Group Mappings in the Mappings section are set as in the screenshot below:
User Mappings
Ensure the User Mappings in the Mappings section are set as in the screenshot below:
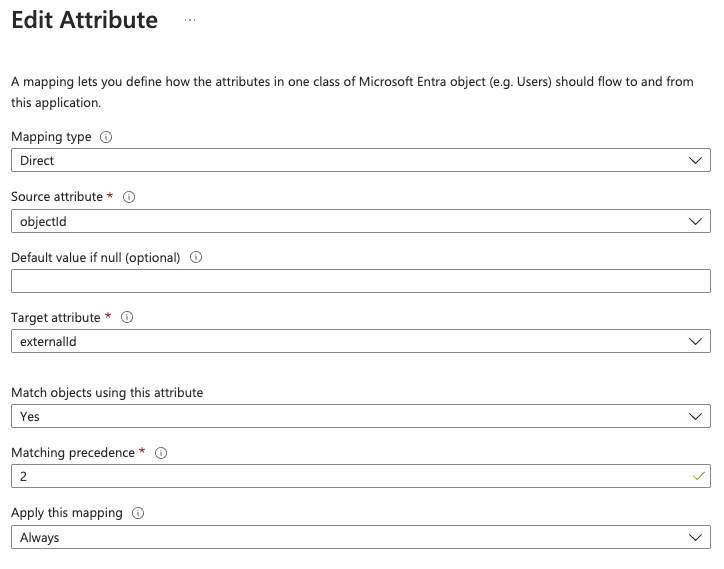
Key fields are highlighted in this screenshot:
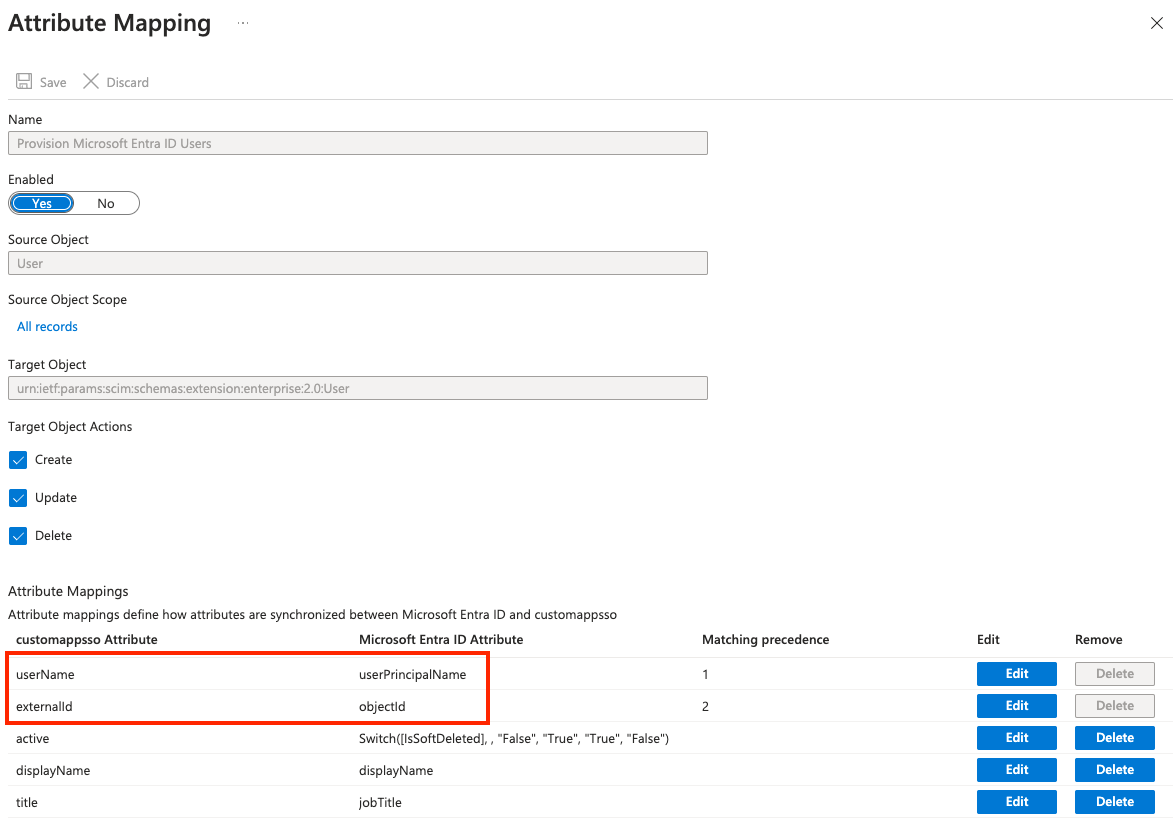
- userName must be the user’s email address as this is a key field in the Brilliant system.
- externalId may need to be set as a custom attribute in your mappings. In the below screenshot it is configured using the Azure/Entra objectId field, which is the user’s unique UUID.